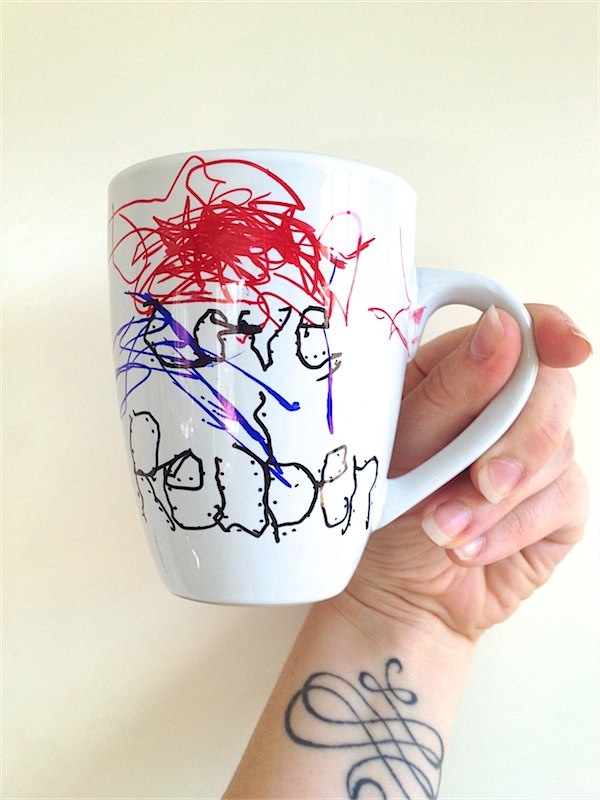
For Reuben I drew dots and let him join them up as best he could.
Father’s day is creeping up on us fast and I have to say I have been anything but organised this year, between making my Father’s Day pinboard look wonderful on pinterest and finding cool suggestions for Father’s day gifts for the blog, I have quite forgotten to organise my own kids for Father’s Day! Ooops!
We have it quite rough in this house hold in the first two weeks of June, my husband’s birthday is the 10th, and my Father in laws is the 15th, which also usually means Father’s day is either on one of those days or between them! So finding things that the kids can do that is crafty but looks good and would be used or appreciated starts to get more difficult… there are only so many crafts you can do in one week before you begin to wonder if you will ever get the paint out of your kitchen work top (or even your kid’s skin) as you sip your wine at 11am. So this time I promise no paints, hardly any mess and two ingredients for the coolest Father’s day gifts ever (without the usual price tag!).
To make your own personalised mugs for Father’s day, you will need:
- One pack of different coloured Sharpie permanent markers
- As many plain white or coloured mugs as you intend to decorate.
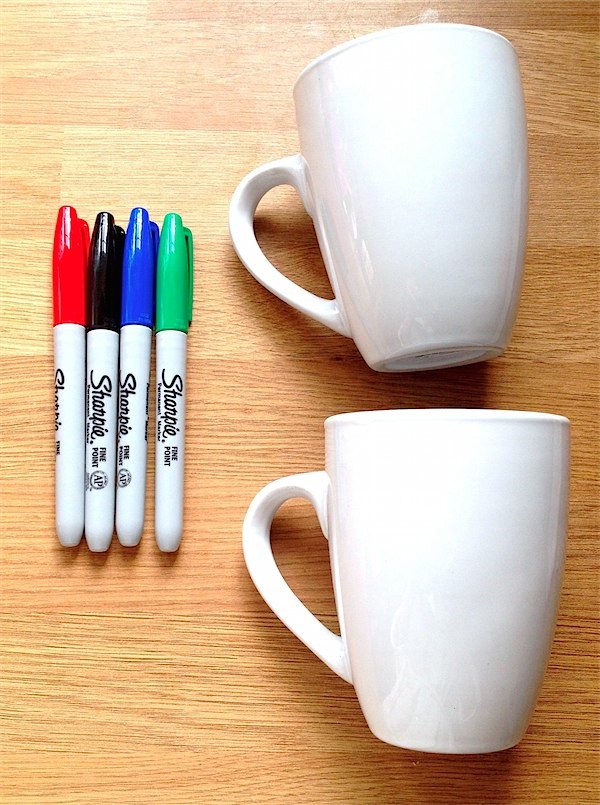
All you need to make your own personalised mugs is a couple of plain mugs and some Sharpie permanent markers (and an oven!)

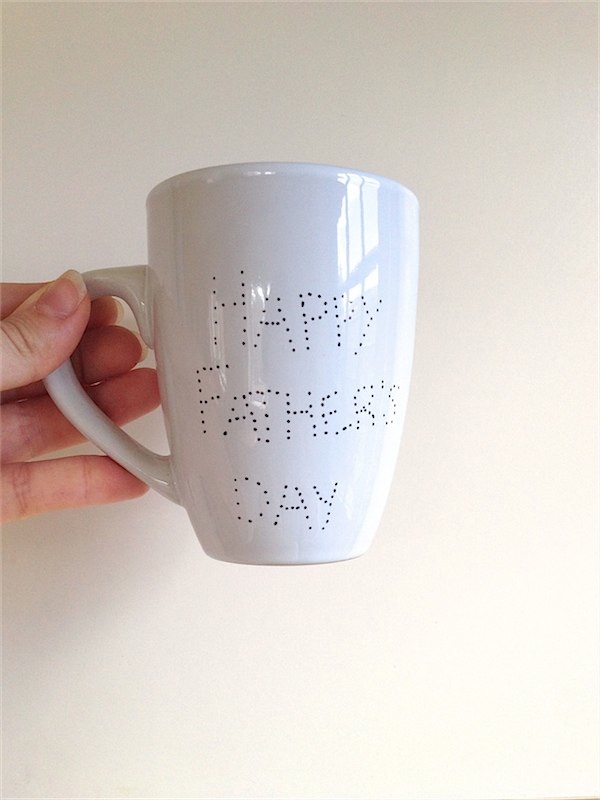
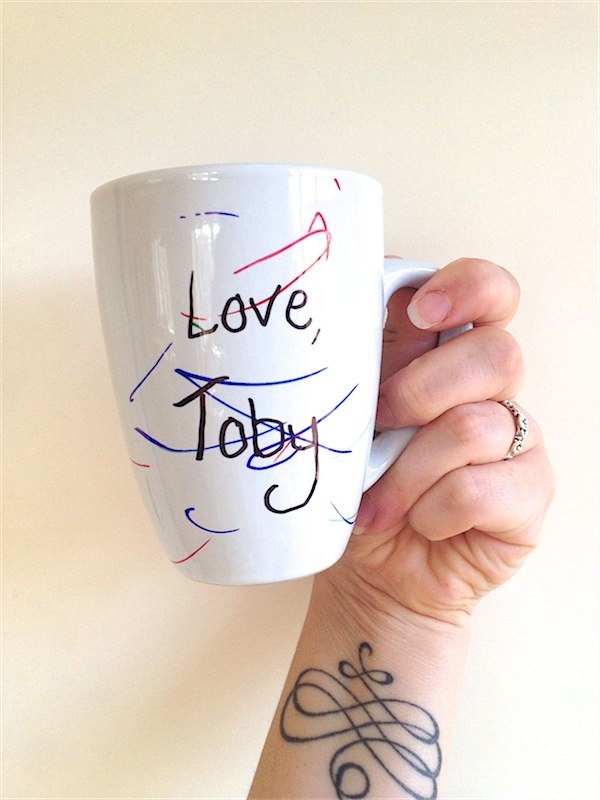
Obviously for Toby I wrote out Happy Father’s day and signed his name because he is too little. You can adapt this to your child’s age.
For Reuben I drew dots and let him join them up as best he could.
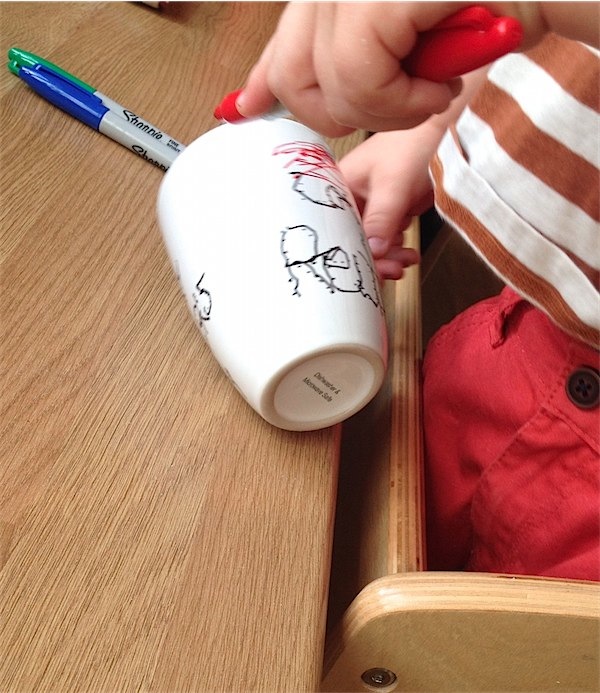
It is remarkably difficult to take pictures of toddlers drawing with permanent markers, especially when the temptation for them to draw on their face is intense!
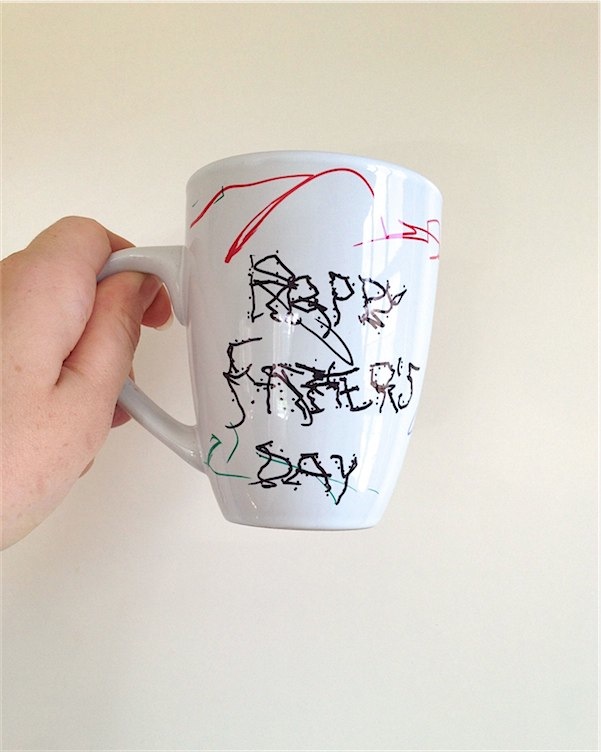
This is Reuben’s mug from the front. (I appreciate it looks… interesting, but which I mean illegible – but that’s the charm for me!)
And the rest of Reuben’s mug from the back. For an older child, this could be beautifully drawn and a perfect afternoon craft.
Toby liked to flick the pens across the mug.
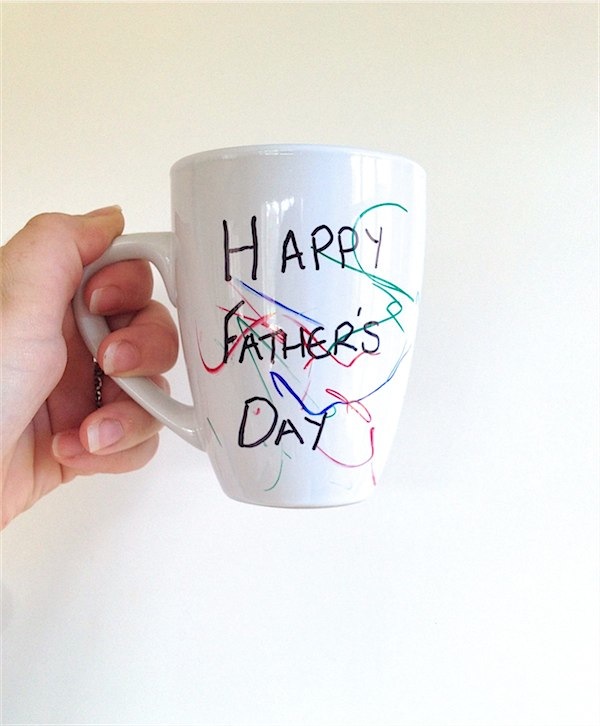
A personalised mug, totally unique to your child is ideal for Father’s Day, it takes 5 minutes and costs under £5 per child.
Turn your oven to GM 4/180C/350F
Give your child a Sharpie.
Inform them to draw only on the mug, certainly not their faces. (though if they do draw on their faces, this will come off, don’t envision them at the graduation with a blue scrawl on their forehead)
Supervise drawing on mug.
Thank them and remove Sharpies from reach of little fingers.
Place the mugs on a tray in the oven for 1 hour 30 minutes (or until the ink changes colour).
Remove and leave to cool, again away from little fingers.
That is it!! You’re welcome.
Harriet x
P.s – if you wanted you could try this with plates or anything, although we stuck with mugs because I am officially crafted out this week!! And it doesn’t have to be for Father’s day, you can do this for birthdays or any occasion.


Hello! You said that the ink changes color? What colors did yours change to?
Can u use a toaster over?
I’m not sure! I can’t see why not though, if you can use the usual oven safe products then I’d hazard a guess at yes 🙂 I would recommend checking your manufacturer instructions to see what is suitable 🙂
Does the marker come off after you wash them?
Not if you bake them – if you are worried about the marker coming off you can buy pens specifically for ceramic. It will only come off if you scrub at it or machine wash. H 🙂
Thank you so much this was a perfect gift for my hubby.
You’re welcome Stephanie xx
What temperature should I set the oven at?
Turn your oven to GM 4/180C/350F 🙂