Wouldn’t it be lovely to have a sensory board in the garden for the kids to play with? Here is how to make one completely effortlessly!
This is one of those perfect summer activities for toddlers & preschoolers that can be done using pretty much anything in your home – especially the old pots and pans, empty bottles and other brick a brack that you have lying around and don’t want littering the garden. Not only does it work out to be so much fun for them, but it is also a great way to get them exploring sounds and how to make music.
What you will need:
- Some kind of board or palette
- A drill or screwdriver
- Various different bottles, pots, pans etc
- A wooden spoon, drumsticks, basting stick etc
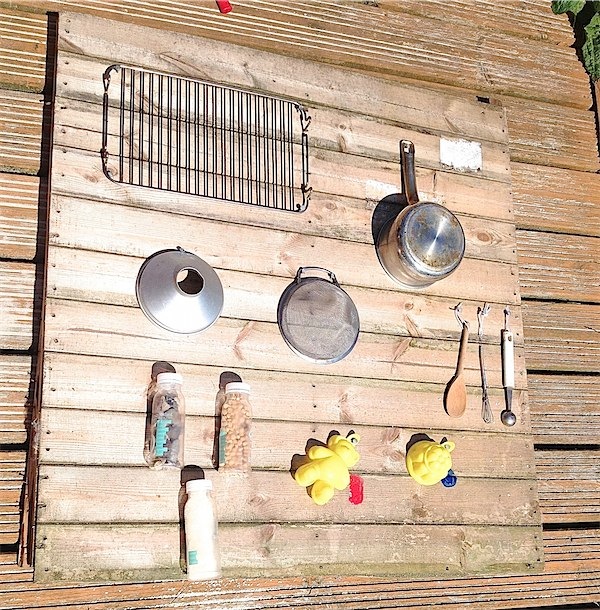
These are a few of the things I used and needed for my sensory board. You can use literally anything!

The bottles were really easy to do and they swivel! Three different utensils for banging on things…I mean, making music!
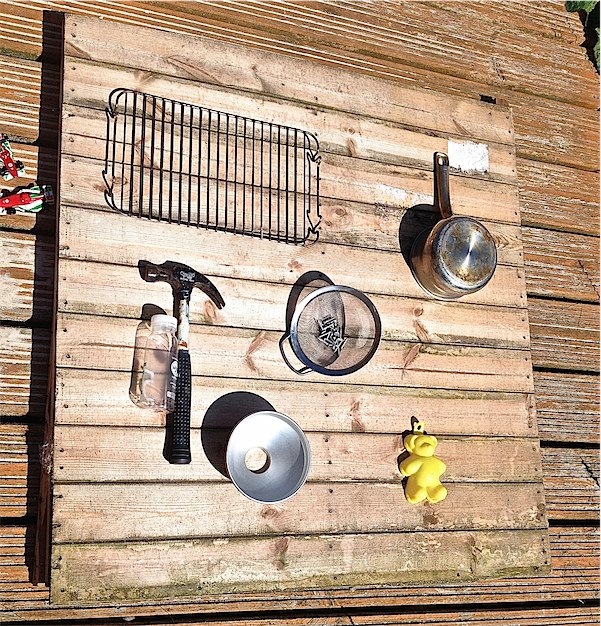
First things first, make sure that your board or the part that you are fitting your bits and bobs to is really secure and sting enough to hold these things, plus take a bit of a beating.
From there, use screws and fasteners and screw on your utensils to the board, depending on how you want your board to look. Try not to have them touching because that will distort sound, but do try to choose a variety of things to make different noises. Don’t use anything that is easily smashed or broken, i.e stick to wooden salad bowls, metal pans, metal cooling racks etc. To secure them using a screwdriver, or drill, with nails that won’t stick out the back.
I also added to mine a couple of plastic bottles filled with various things. I pushed the nail through to make a hole, which I then widened to get the nail head through. Once I had done that I flipped the bottle over and hammered the nail into place, so the bottle was secure. Then I filled each bottle with different things!
I also added some old plastic jelly moulds which I hooked onto a nail so they swivel back and forth. Underneath I painted a little block of colour for fun. They loved pulled back to moulds to see which colour was underneath.

This was before the board was even finished! Toby loves it, he spent ages banging on the pan, and then unhooking an re hooking the moulds!
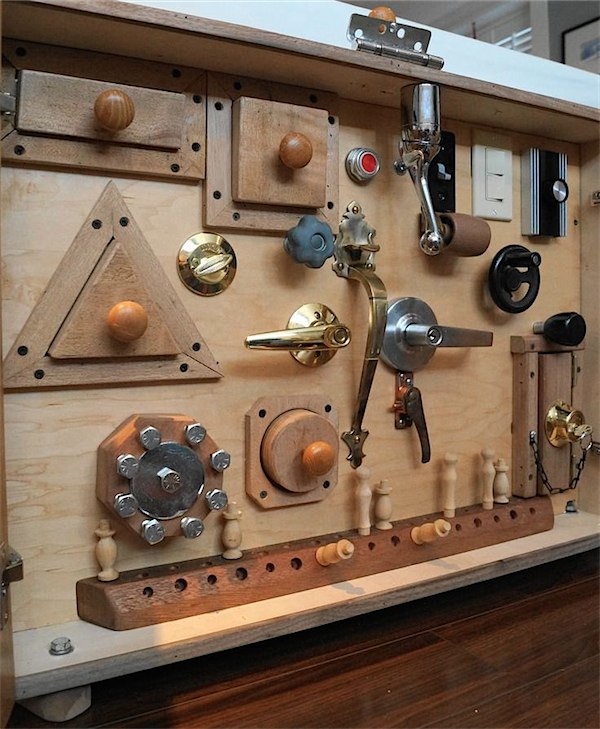
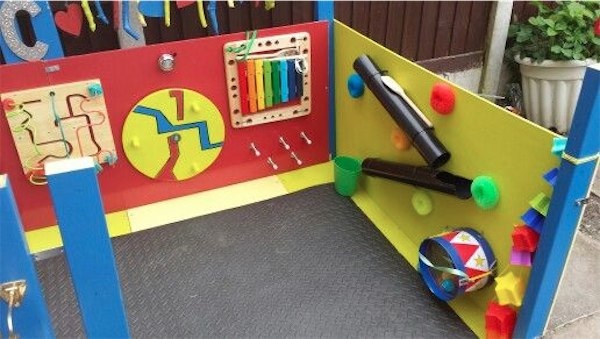
Here is some inspiration for other sensory boards that I have found on pinterest:
Via Elizabeth Ramos, I think this is a brilliant sensory board so fun and full of things to open and shut! Toddler heaven!
What about reusing old toys that don’t get played with anymore? Great idea from Sarah Copeland.
The sky is the limit and you can add whatever you want to the board. Once you are happy that the pieces are secure you can bring out the wooden spoons, drumsticks, metal spoons etc for using as tools to tap the music board with.
Simple!
Harriet x


