4 syns per slice and oh-so-amazing!
Last week I bumped into a friend who I haven’t seen for ages during a little jaunt into town with Edie who was having a serious case of nap avoidance. After cooing over Edie and asking about each other’s families/lives we got to chatting about Instagram. I am allll about that Instagram right now and Lisa is an Instagram superstar with over 16,000 followers to her name. Why does she have this many? Because she is a total inspiration to thousands of men and women wanting to lose weight and get into a healthier lifestyle with over 9 stone (126lbs for our American friends) of weight lost altogether. How did she do it?
Slimming world.
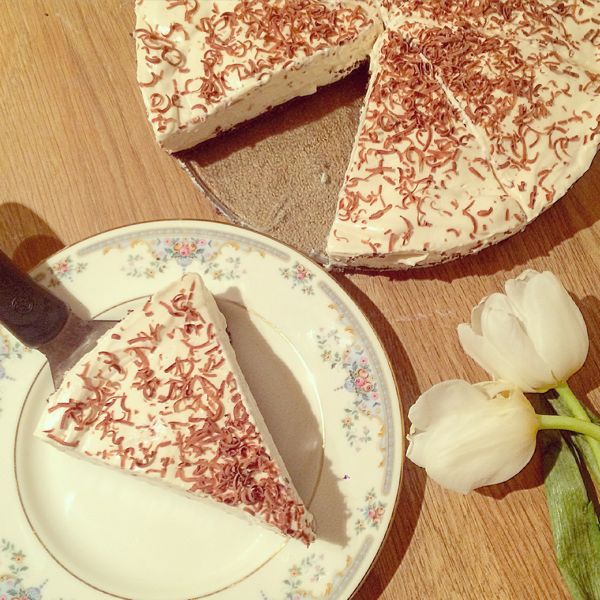
So when we were chatting she told me to try out a slimming world dessert recipe and see for myself how amazing the lifestyle was, and she would share it with all her followers if I tagged her. So, never one to shy from a challenge, I did just that. I took to Pinterest with the enthusiasm that one can only get from typing the words “delicious desserts” into a laptop and began to drool. Around an hour later I was withdrawing what can only be described as heaven on a plate out of the oven. I did share a snapshot of the Bailey’s Cheescake on social, and I have since had soooo many requests for the recipe it is unreal. So, without further mutterings from me, I present you with a slimming world approved baileys Cheescake that you need to make. Now.
What you need:
- Low calorie cooking spray to grease the tin
- 10 gingernut biscuits
- 3 egg whites
- 4 tsp powdered gelatine
- 450g quark
- 500g fat free natural fromage frais, plus 4 tbsp, sweetened to taste, to serve
- 4 tbsp Baileys Irish Cream liqueur
- 3-4 tbsp sweetener
- 25g chocolate curls, to decorate (or use grated milk chocolate)
Method
First things first, Preheat your oven to 190°C/170°C Fan/Gas 5 and grease your cake tine (I used a 20cm springform tin) with the low calorie cooking spray and line with baking parchment.
Put your biscuits in a polythene bag (try not to take a bite out of any of them!) and crush with a rolling pin – or your could blitz them in a blender if you wanted. Whisk up 1 egg white and add the biscuit crumbs making sure to mix everything together so you don’t get any egg left showing. Spread over the base of your tin and bake for 15 mins, setting aside to cool whilst you do the filling.
Dissolve your gelatine powder in 4 tablespoons of boiling water.
Mix the quark with the fromage frais, liqueur and sweetener and set aside while you whisk the remaining egg whites until stiff peaks form, then gently fold into the quark mixture along with the gelatine. Make sure the biscuit base is cool enough to touch and then pour the filling over, smooth the top to make it look pretty and chill for at least 3 hours or until set.
Once set, release it from it’s tin and grate over some chocolate or add the chocolate curls. Devour piece by piece… my obsession with food continues!
Syns: 4 per slice, makes 8-10 slices.
H x


Makes far too much topping for the quantity of base – Sorry but I feel much of it will be wasted.
Once you have mixed the gelatine with the water stand the cup/bowl in a pan of hot water & stir until the gelatine is liquid, then you can add it to the yogurt mix & it will set properly.
Is there another way of dissolving the gelatine as it formed pretty much straight away causing the topping not to set and becoming runny…
Gelatine began forming
Unfortunately turned out runny
Recipe needs to be changed.
Gelatine needs to be melted later on in the recipe
Disappointing as just tasted like a baileys yoghurt as never firmed up.